Make final edits
Required: You'll need the following to make the final edits and complete your manual migration:
- An FTP app to access your site's configuration file. We recommend FileZilla.
- A text editor to edit your site's configuration file. We recommend Notepad++. Do not edit files with a word processing application like Microsoft Word.
- Your database table prefix from the step - Import your database.
This is the last step of the Migrate my WordPress site manually series.
You're almost finished moving your WordPress site manually! To make the final edits to your site's configuration file, you'll be connecting to your new site with an FTP app and editing the wp-config.php file. You'll need to update the table prefix as well as assign your new Siteurl and Home. These changes will let your site connect to your new database.
- Connect to the new WordPress site with an FTP app. (Need help connecting with FTP?)
- In FileZilla on the Remote site side, right-click
wp-config.phpto open the menu, then select View/Edit.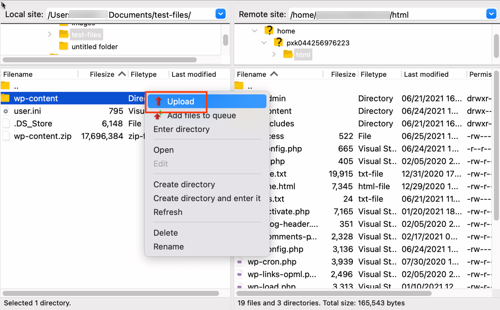
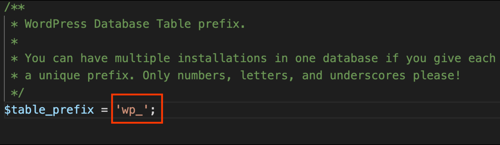
- In your editor, find
$table_prefixand edit it to reflect the correct prefix of the database you imported in the earlier step — Import your database. In the example below, the original table prefix was'wp_9666d08kk3_'and we updated it to'wp_'.
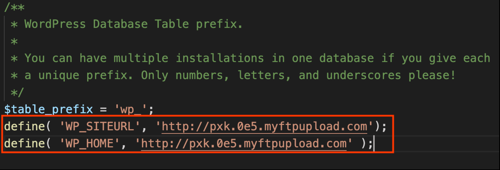
- Edit the Siteurl and Home so they match the domain associated with your new WordPress site. In this example we have the temporary domain that was assigned when the account was set up: 'pxk.0e5.myftpupload.com'. Use the domain-specific to your account situation.
- Siteurl: define( 'WP_SITEURL', 'http://coolexample.com');
- Home: define( 'WP_HOME', 'http://coolexample.com');
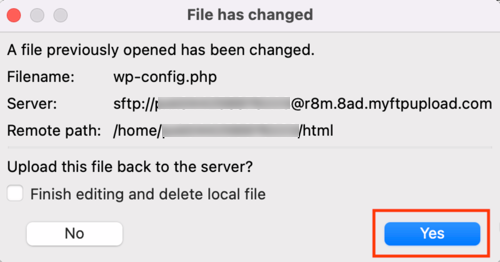
Note: Defining the Siteurl and Home in your
wp-config.phpis temporary until you're ready to point your domain at this new hosting account. - In your editor, save the changes. FileZilla will detect and acknowledge a change was made and offer to upload the file to the new site. In FileZilla, select Yes.
Congrats! You've finished manually moving your WordPress site. Check out the following related steps to get your domain pointed at the new WordPress site.
Related steps
- For WordPress or Managed WordPress plans, find and select the Change domain link in your admin dashboard and we'll take care of the rest for you.

- If your domain is registered in another GoDaddy account, you'll need to find your IP address, then change your A Record.
